FINALLY!
It has been a long and at times exhausting process to get this design done and on budget. We've been dreaming about this house for many years and were so excited when we had the final plans available at the end of winter last year (2012).
Then came reality - we simply couldn't afford the design and some compromises had to be made. There were a few days back then when it looked to us like we might have shelve the project. But Paul was optimistic he could cut some costs. We put together a "razor gang" list of items we were prepared to compromise on and that we thought could go, and Paul did similar from construction side of things.
In the end, after it was all done, we realised we hadn't actually had to compromise on anything at all. In fact, even if we had the money there isn't anything we have changed to cut costs that we would not be happy to do anyway given the option.
We will still have an amazing looking house architecturally designed and constructed with quality as paramount.
Here is how we did it!
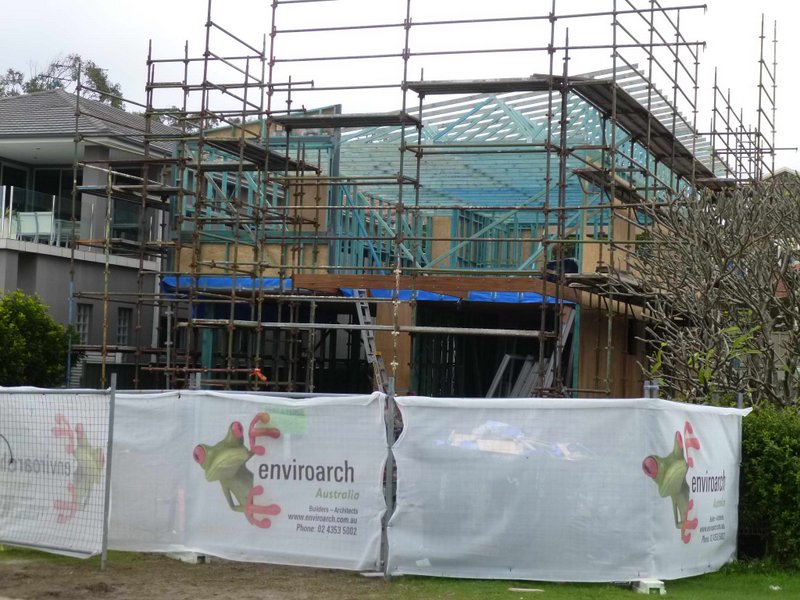
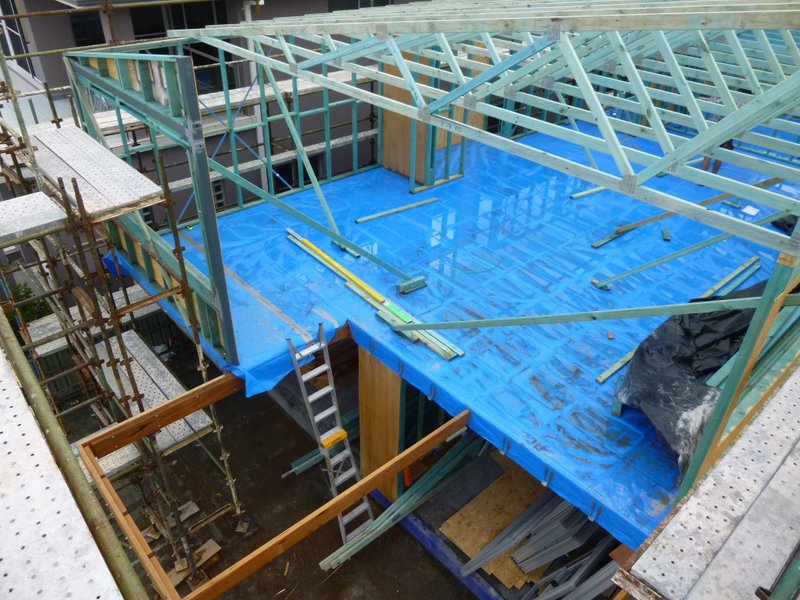
Roof Structure
By far the biggest saving was made by changing from a one piece solid core roof with internal raked ceiling, to a traditional (still skillion) truss and colorbond roof, with the internal ceiling flat (at 2700mm). We did keep the raked ceiling on the front upper level deck!
Saving >$20,000
Windows
Glass isn't cheap! And we had a lot of glass. We went through window by window looking at the purpose of the window - ventilation, lighting, both etc... Although this was already done to a degree, we just took it much further. Paul then looked over it and added some back or changed some depending on what was required.
In the end, we've still got some massive windows overlooking the view, lots of louver windows where ventilation is required, but some simple yet stylish ones in other locations.
The change in roof structure also allowed us to avoid having a series of highly placed louver windows for ventilation of the raked ceiling space.
We also stripped crimsafe back to just the essential elements, like bedroom screen doors (to deck) and windows we would want to keep open when not at home.
Saving ~$15,000
Lighting
Original specification had custom 3s lighting essentially through the whole house. Paul rejigged the lighting layout to have the custom 3s lighting in "public" areas and mixed with some cheaper but still nice off the shelf lighting in bedrooms, laundry etc.
Saving ~$4000
Rumpus Door
Originally the Rumpus had a 5m stackable sliding door separating it from the main living area. We got ride of this in favour of a wall and 2m sliding door. The area is actually a more usable space as a result, and still open enough for our needs.
Saving ~$3000
Kitchen Island Bench
We're not sure on exactly how much this saved as the joinery quote went up and down a few times and we lost track (as we added in lots of in built joinery). But one way we minimised kitchen cost was to have our island bench exactly the same length as one piece of engineered stone (Quantum Quartz). ~3200mm. This means we can use the one piece of stone for both the island bench and the long cooktop bench as they make them wide enough that the cut would give us two usable pieces.
Saving ~$1500 (?)
Balustrade
Original specification was for the top rail of all the balustrade both internal and external to be stainless steel. We replaced with timber for top rail only, still retaining stainless steel uprights and cabling.
Saving ~$2500
External Shower and Surfboard Cupboard
We originally had an inbuilt shower and surfboard storage cupboard. We got ride of this and replaced with an open air shower with privacy screens and no storage, we've got enough storage elsewhere anyway.
Saving ~$1000
Render
There was a section of wall and some sections of retaining walls that had render on them. We aren't big fans of render in coastal environments in particular and we could do these areas just as well with other methods - so we did!
Saving ~$2000
Joinery
We really wanted to have all joinery built in, and we almost got it. The only joinery we are not getting is the garage, which is fine, we'll knock something up ourselves after we move in.
The exciting thing though, because we saved so much elsewhere we were able to get living room joinery built in, all bedroom joinery including a full room length low level set of drawers in master bedroom, as well as a rumpus work space with desk and overhead cupboards.
The only furniture we need when we move in is beds, lounges and dining table & chairs!
External Decks
We actually didn't make any real saving here except for ongoing maintenance. We removed all timber decking from the ground floor (about 20 square metres in total) and replaced with polished concrete.
What we didn't compromise on:
Size - the house is still ample in size and we haven't had to lose anything in room sizes, decking etc.
Facade - Exposed blackbutt timber beams are used in various locations around the house, such as decking support, entrance area etc. We kept these. We also retaining appearance with nice louver windows, sunshades over windows, skillion roof, large open deck etc.
Electrical - apart from lighting specification, we didn't remove any electrical fittings. We've got power points everywhere we could ever imagine needing (2 or 3 in each bedroom, every wall throughout house, and two external points front and rear etc. We also got data cabling to rumpus and living areas for computing, entertainment and communication.
Plumbing - similar to electrical, this is one thing we didn't want to compromise on. We've got three external taps, external shower, and everything we need inside as well.
Flooring - polished concrete downstairs and Europlank upstairs. It will look a treat!
Inclusions - as mentioned, there were some joinery items we wanted, we also are getting an in built day bed, a gas heater installed, walk in pantry, built in bathroom wall cabinets. Basically everything except window coverings and things to sleep and sit on (oh, we are getting that daybed though!)
Finishing - hardwood timber, stainless steel, , polished concrete, quality plumbing and electrical fittings, square set cornices etc are still throughout the house. Apart from the amazing design, the fittings and finishing both internal and external are what will set the house apart from the standard project home.
Now we can build! Yahooooo!